BILL Network
The BILL Network connects millions of companies to vendors and large billers, enabling them to pay and get paid electronically through the BILL platform. With over 7 million entities on the network, AP customers can send fast, secure ePayments, simplify vendor onboarding, and automatically reconcile payments—saving time and reducing manual work.
Vendor types
When you create a vendor at BILL, you have the following two different options for the type of vendor you can create:
- Private vendor
- Public / Network vendor
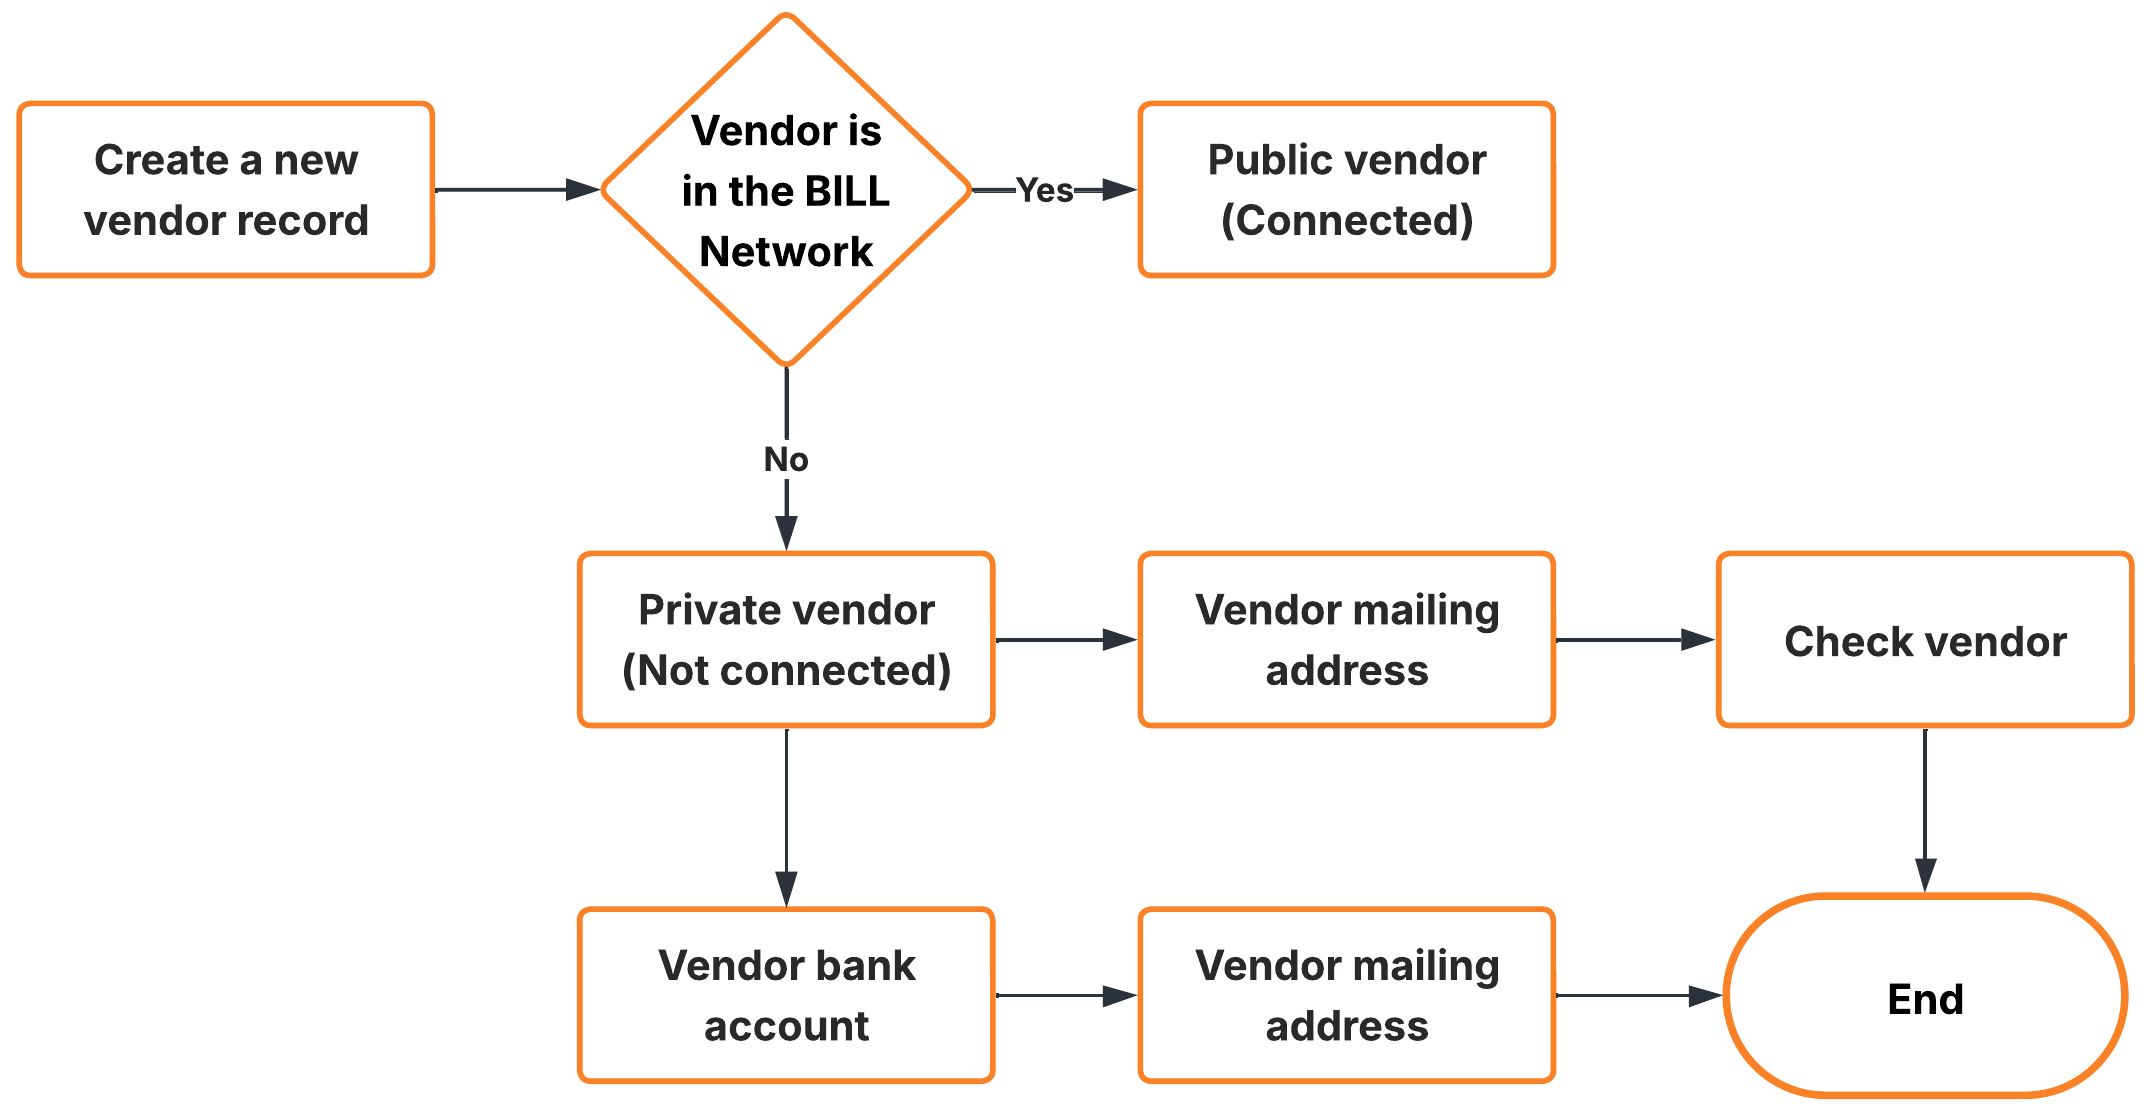
Vendor record flowchart
Private vendors
A private vendor is a record not connected to the BILL network. You manage the vendor details manually.
- Check vendor: You provide an address; BILL mails a paper check.
- Private ACH vendor: You provide bank details; BILL sends electronic payments.
- Virtual card: If a private vendor accepts virtual cards, BILL automatically updates the payment method to "virtual card" via the auto-enrollment process. See BILL terminologies to learn more about the auto-enrollment process.
Public / Network vendors
Public vendors are entities already established on the BILL Network. The table below describes the specific public vendor types and their connection requirements.
| Vendor type | Details |
|---|---|
| RPPS vendors (Verified National Vendors) | This directory includes large billers, such as national or regional telecommunications companies, utility companies, banks, and large retailers. These vendors always require an account number (and occasionally a zip code) to connect and pay. No acceptance is required for connection. Provided the account number and, if required, zip code pass validation, the payer connects for electronic payments. |
| BILL AR organizations (Advanced Receivables) | These are companies or individuals who subscribe to BILL directly or through a partner for the "full receivables" solution. These organizations must accept an invite before they show as a CONNECTED network status and can be paid electronically. |
| BILL BR Organizations (Basic Receivables) | These are companies that joined the BILL Network for free via an invite from a BILL subscriber and created an account to manage their payment information. No acceptance is needed for these organizations to show as a CONNECTED network status. |
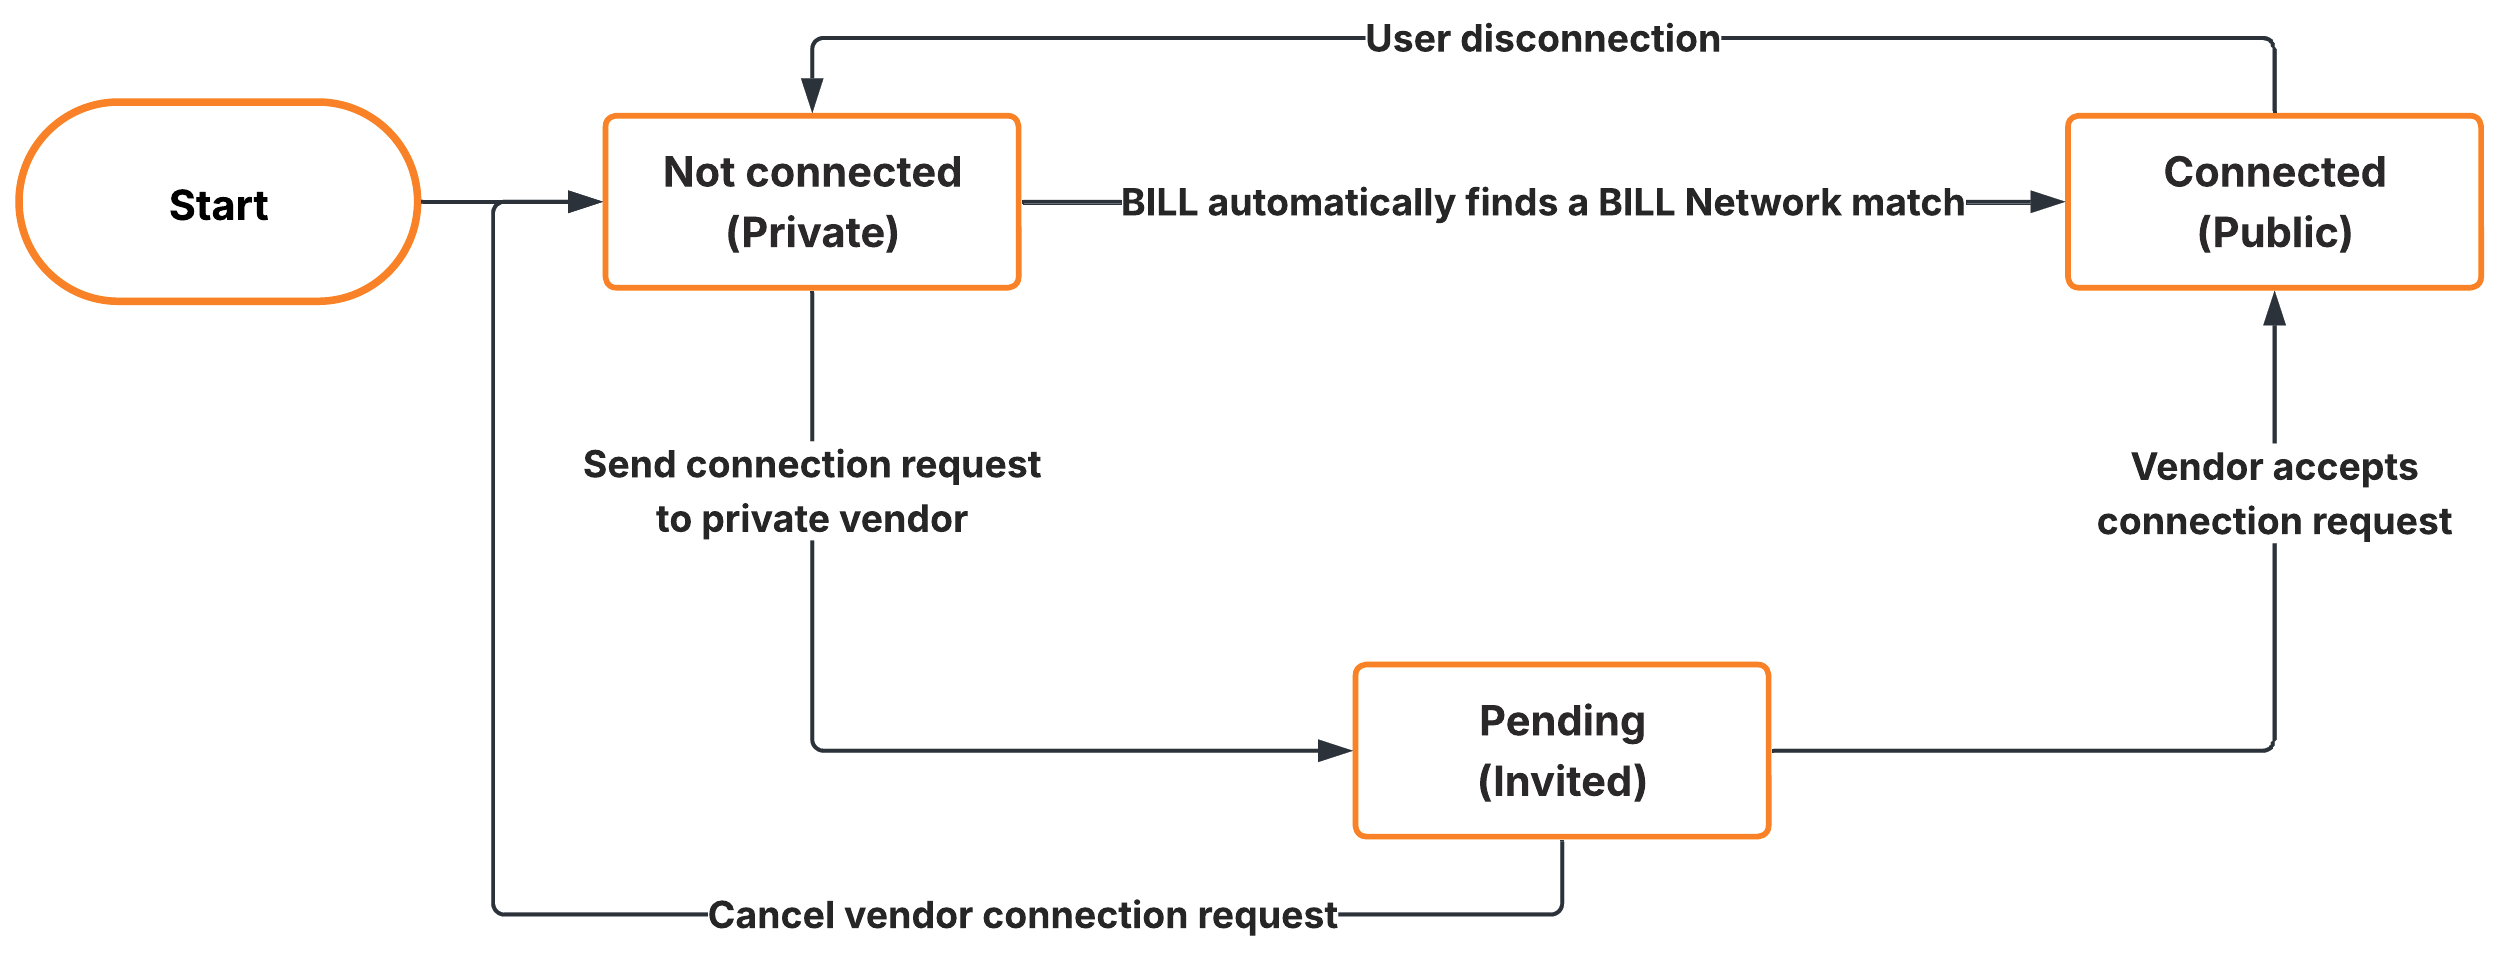
Interacting with the BILL Network
Connecting to the Network
Private vendors can convert to public vendors to enable electronic payments in a couple of ways.
- Auto-connect: BILL’s backend systems automatically match private vendor details against the network. If a confident match is found, the system updates the vendor details to the public profile.
- Manual search: You can leverage Vendor setup Element to search the network using private vendor details. If you find a match (RPPS, AR, or BR), you can connect manually.
- Vendor invitation: You can invite a private vendor to create a Basic Receivables (BR) account. Once the vendor accepts the invite, they become a public vendor.
Disconnecting from the Network
If you connect to the wrong network node or would prefer to manage payment preferences manually, you can disconnect from a public vendor.
- Prerequisite: Ensure no payments are currently processing or scheduled. You must wait for completion or void the payments before disconnecting.
- Address verification: Confirm the vendor’s address upon disconnect to ensure future checks arrive at the correct location.
Implementation guidelines
This section details how to build the vendor management interface based on the vendor's Network Status.
Vendor state lifecycle
Status | Scenario | How do I manage this vendor in my system? |
|---|---|---|
| The vendor is a Private vendor. |
|
| The vendor has been invited to the network but has not yet accepted. |
|
| The vendor is a Public / Network vendor on the BILL Network. |
|
Developer implementation details
This section is for developer integration.
Vendor setup (Domestic and International)
- Create vendor: Use the API (
POST /v3/vendors) to create a new vendor with domestic or international fields. - Element option: Use the Vendor setup Element to add domestic or international vendors.
Vendor management
API option
-
Retrieve a list of vendors: Use the API (
GET /v3/vendors) to get a list of vendor objects.NOTE: By default, you get 20 results on one page of results.
-
Retrieve vendor details: Use the API (
GET /v3/vendors/vendorId) to get details about an existing vendor. -
Update a vendor: Use the API (
PATCH /v3/vendors/vendorId) to update details about an existing vendor. -
Archive a vendor: Use the API (
POST /v3/vendors/vendorId/archive) to archive an existing vendor. -
Restore an achieved vendor: Use the API (
POST /v3/vendors/vendorId/restore) to restore an archived vendor.
Element option
Use the Vendors Element to manage vendors.
Updated about 1 month ago