Vendors: User experience
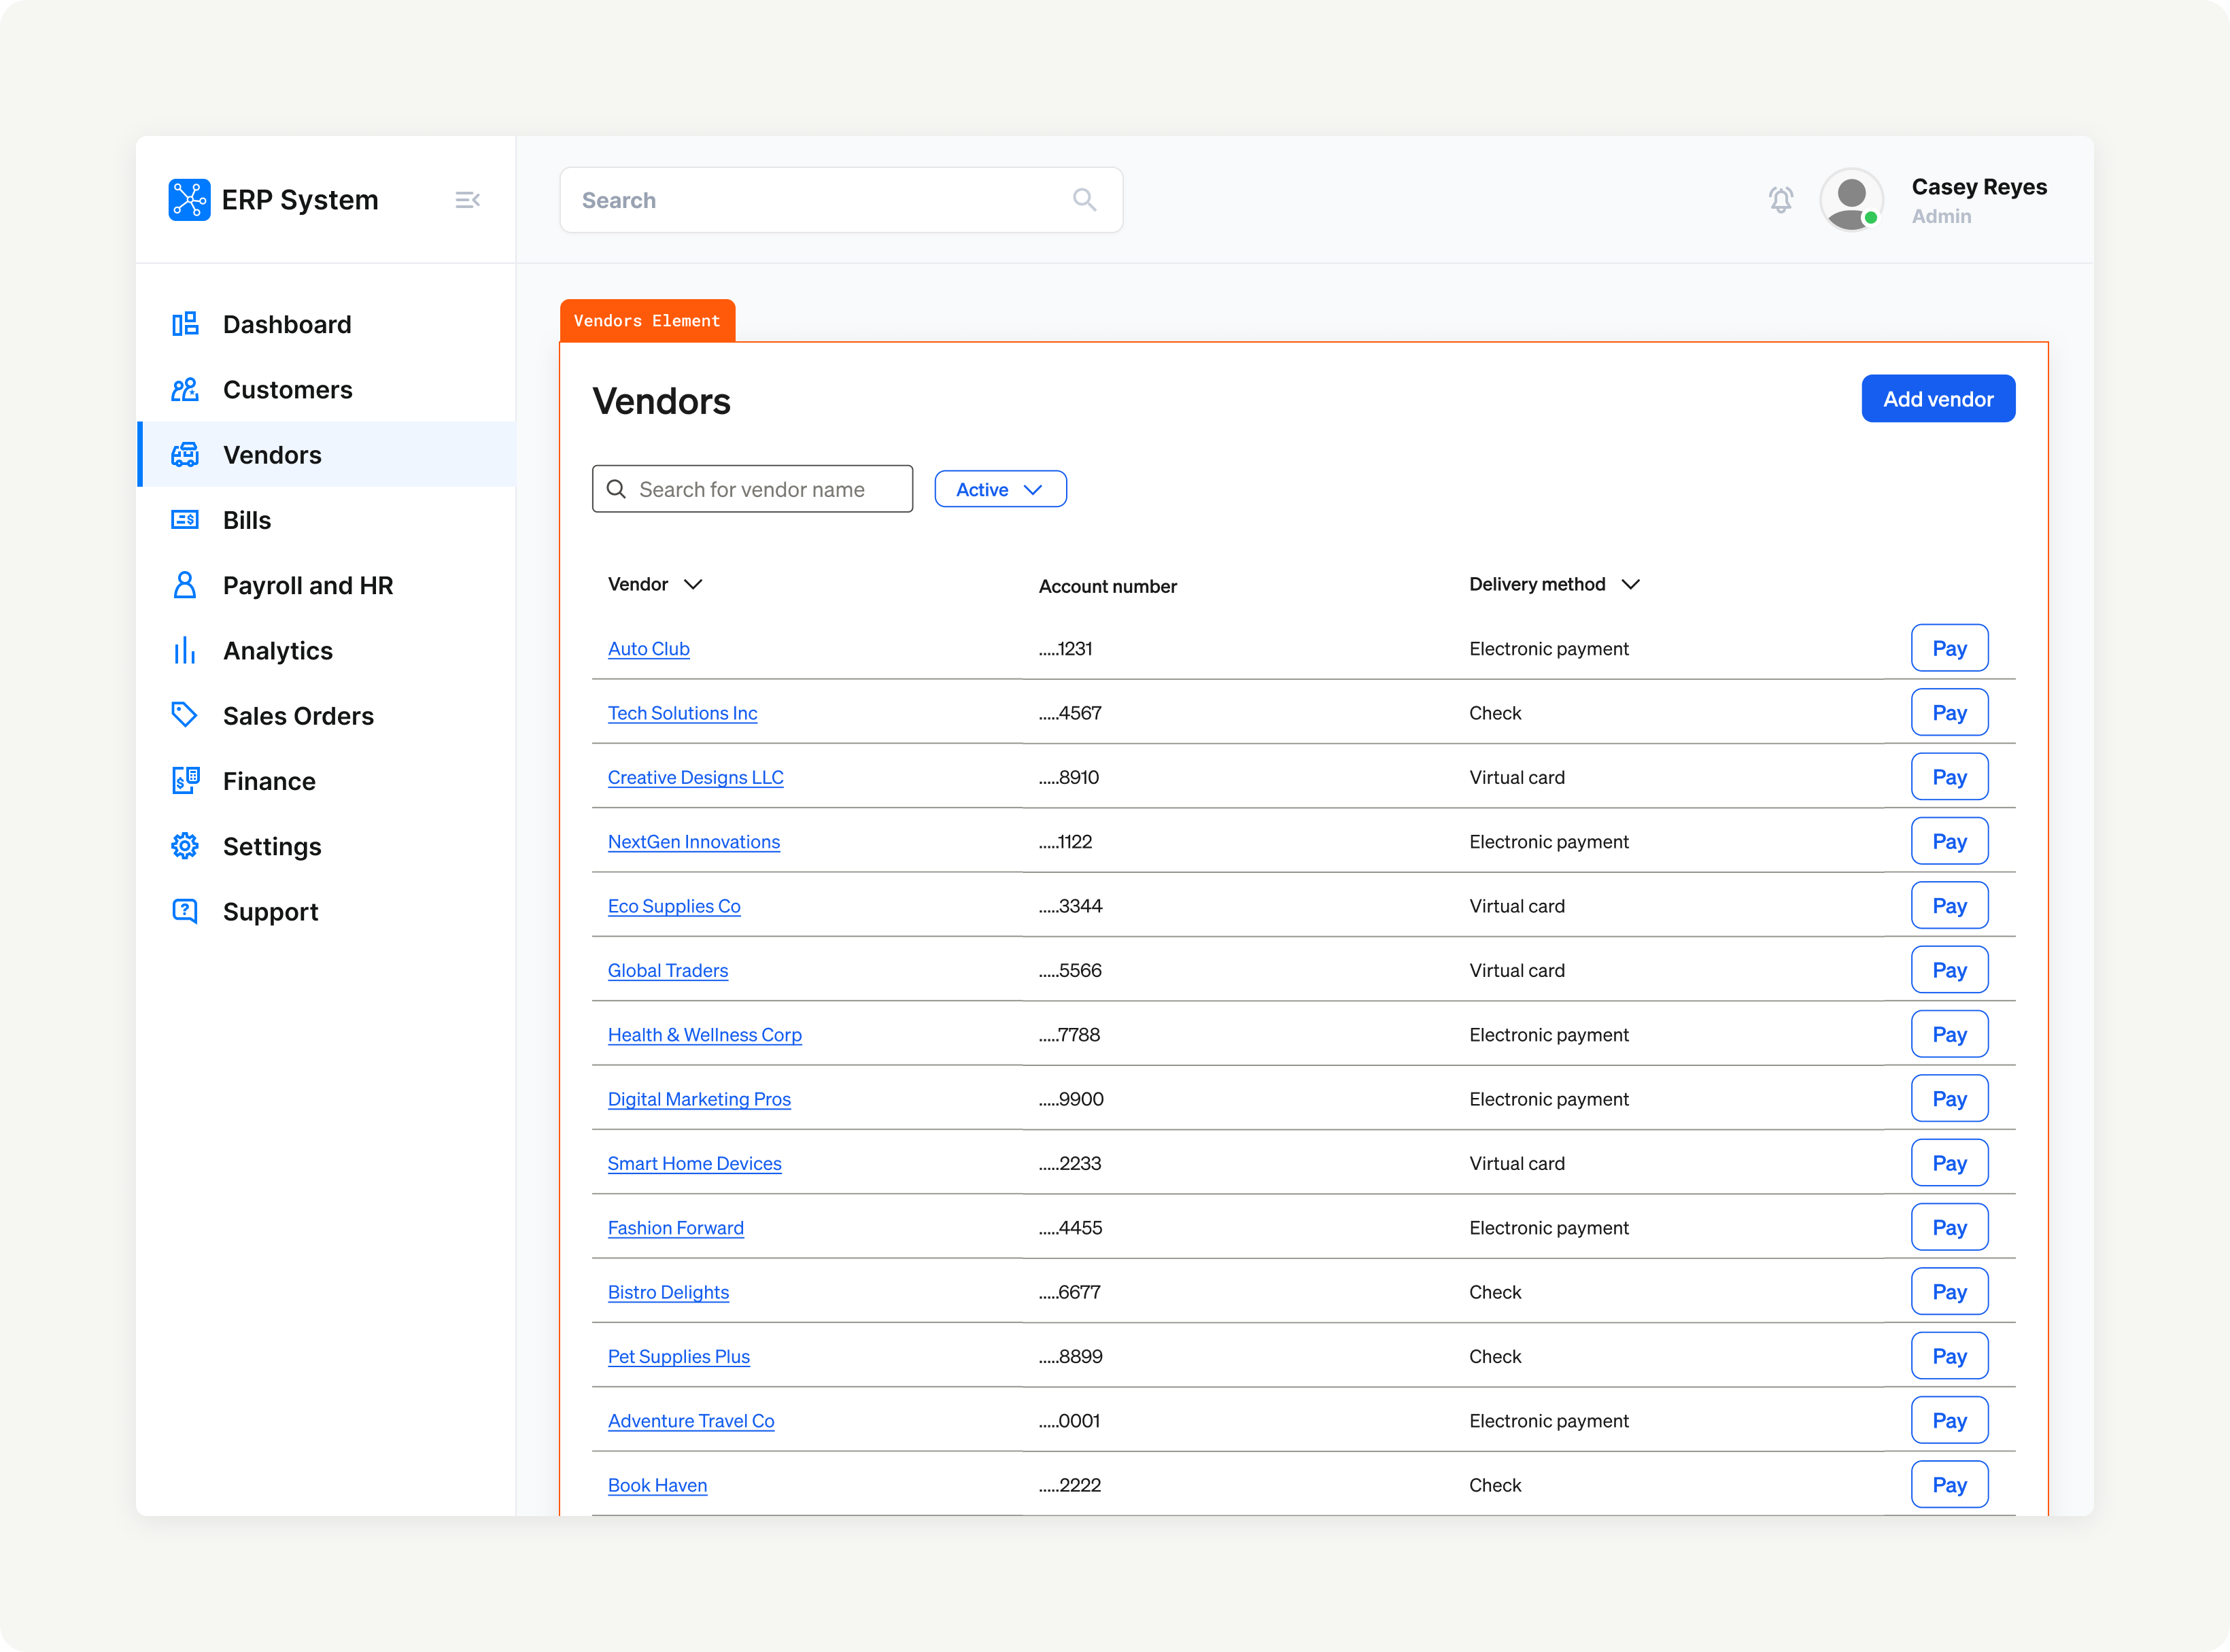
In this section, we showcase visuals and the primary user interactions with the Vendors Element.
See Vendors: Implementation for implementation details, including pre-conditions, custom events, and error handling.
Core behavior and requirements
With the Vendors Element, BILL has a set of requirements for the expected behavior.
| Behavior & requirements | Description |
|---|---|
| User role | The organization user must have an account in the BILL organization to view the Vendors Element. |
| Empty state view | If the user has no vendors, the user is prompted to add a new vendor. Adding a new vendor record is available with the Vendor setup Element. See Vendor setup Element for more information. |
Plan your user experience
In this section, we outline key considerations for planning a seamless user experience when integrating with the Vendors Element into your application. Ensure that you address each point thoughtfully to realize the full value of the Element capabilities in your existing experience.

Element overview
Assumptions
When the user is using the Vendors Element, BILL makes the following assumption.
- The user has an account in the BILL organization
Entry points
There are a set of workflows where the Vendors Element can be integrated.
- When the user is attempting to view a list of all their vendors
- When the user is attempting to view details of their vendors
Element entry points
- When the user is attempting to search for a vendor
- When the user is attempting to add a new vendor to their BILL Network
- When the user is attempting to schedule a payment to a vendor or view historical payments to a vendor
- When the user is attempting to edit vendor details
Map the user flow
Map the complete user flow from viewing a list of vendors to successfully completing the process of scheduling a payment.
Maintain context
Ensure that your users understand that they are viewing a list of vendors from their organization in the BILL Network.
Related Elements
BILL Elements are connected and understanding this connection and hierarchy enables you to understand the user experience better.
| Connection | Description |
|---|---|
| Parent | Onboarding Element : The user can complete BILL KYC/KYB checks for the organization, set up MFA, add funding payment methods for paying vendors and bills, and complete user verification (if required). MFA Element : MFA is required for the user to add a funding payment method. When the signed-in user session is not MFA-trusted, the user is required to complete the MFA setup. Add funding Element : The user can add funding payment methods in the organization. Manage funding Element : The user can add additional funding payment methods and manage existing funding method details in the organization. User verification Element : The user may be required to complete one-time BILL risk verification before the user can use a funding payment method for payments. Vendor setup Element : The user can create a new vendor record or connect an existing vendor record from their organization to a vendor in the BILL network or invite their vendor to the BILL Network. |
| Child | Payments Element: The user can view and manage their scheduled, in-flight, and historical payments made to vendors. Schedule payment Element: The user can schedule a one-time payment to a vendor. |
Updated 5 months ago
What’s Next
Now that you understand the user experience, the next step is to integrate the Vendors element. Continue to the Implementation section to learn about pre-conditions, custom events, and error handling.